A tool I’ve little doubt is familiar to those of you who are Illustrators or Designers is the technical marvel known simply as, the airbrush.
But whether you’re a Make-up Artist, Nail Technician or Fashion Designer, at some time or other you may well have considered expanding your skillset to include this simple, yet effective device.
Last month we introduced some things to consider about 3D Printers, this time we’ll attempt to overcome some of the mystique around airbrushes and compressors.
So, what are they?
Airbrush: In its simplest form an airbrush works in much the same way as an old fashioned perfume atomizer; a fast moving stream of air passes over a reservoir of paint (perfume, ink or dye) creating a vacuum, the change in pressure as the paint is drawn along with the airflow causes the formation of tiny droplets which are then ejected out of a nozzle onto whatever medium the artist has chosen e.g. paper, canvas, cloth, skin or nails … of course there’s more to it but that’s all you really need to know, at least for now.
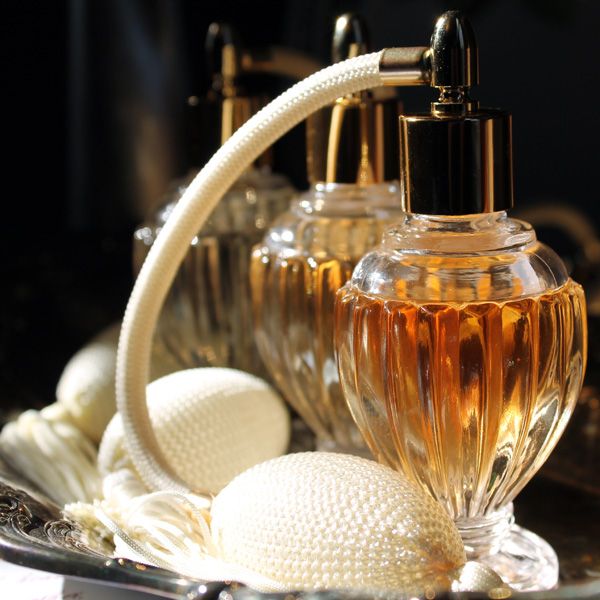
The vintage style perfume atomiser (above) uses exactly the same method as the airbrush used by the Make-up Artist (below) to spray a fine mist.

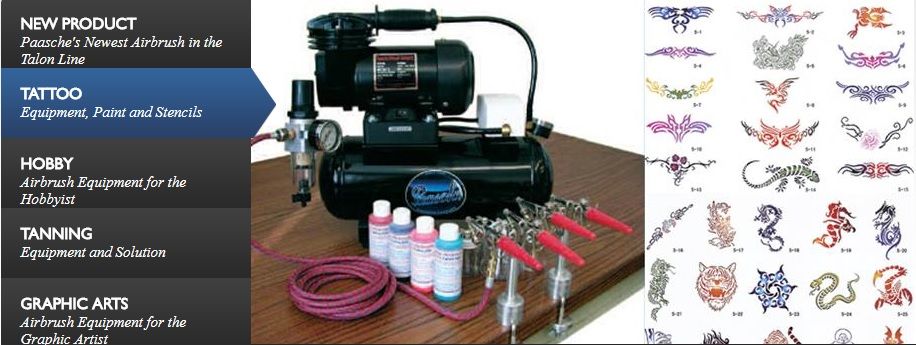
Compressor: Quite simply a compressor is an air pump; however, using technical wizardry it not only delivers air in a constant stream it also can be adjusted to provide the flow at a variety of pressures.
The constant air stream is important for a smooth, even delivery of droplets whereas different choices of air pressure allow for different volumes of droplets. Higher pressure; means higher air flow so more droplets, this means greater coverage. Lower the air pressure and you’ll reduce the flow allowing for finer detail work.
A small compressor is by far the best option and for any commercial uses of an airbrush the only economical one.
What are they good for?
An airbrush is a fantastic way to deliver a fine spray of media in a controlled stream. The volume of paint (we’ll use paint as an example) can be adjusted by modifying the air pressure and using a trigger atop the airbrush for super-fine control, seamless blends and transitions in colour are easily achieved.
Essentially, any media form, be it paint (acrylic, enamel, watercolour etc) ink or dye can be used with an airbrush whether water, alcohol or silicon based, the airbrush doesn’t care providing the media has been thinned sufficiently to flow through the nozzle.
Using an airbrush in conjunction with stencils allow for pin sharp, reproducible images to be quickly created. Readily available in a staggering array of images, forms and shapes, stencils are a creative art form in their own right and a great way to achieve satisfactory results while mastering some of the finer techniques of airbrush artistry.
Pros and Cons
I think we’ve covered the Pros sufficiently above, but what about the Cons.
OK, this one is …
IMPORTANT: An airbrush generates very fine droplets of media which create an inhalation hazard. Depending on your media a spray booth that extracts airborne particles is advisable when using an airbrush in a confined space and certainly for prolonged periods of time. Also wearing a respirator or face mask is essential for both you and your client(s) when undertaking airbrush work. Check your Health and Safety regulations and responsibilities thoroughly.
This is going to sting; the setup cost is quite expensive; a decent airbrush is going to cost about £150-£200 and a compressor (with adjustable air pressure) £300-£350. On top of which there’s paint, thinners, airbrush cleaner/solvent and all the usual bits and bobs that go with a new artistic discipline, e.g. cleaning pots, mixing bottles, stencils etc. plus any additional costs to be compliant with Health and Safety.
Ordinarily I’d say “time” as a con when learning a new tool, however you will find you can achieve some very satisfactory and encouraging results with a modest amount of practice … of course, your personal artistic flair will take you further but the airbrush itself is not a difficult one to get to grips with.
I’m still not put off, but where do I start?
Getting started is going to be expensive, of course you can cut corners but this time I really don’t recommend it, and here’s why.
While you can buy cheap, knock off airbrushes and use canned air instead of a compressor this is a totally false economy. With airbrushes you get what you pay for, buying a quality airbrush will ensure better and more consistent results allowing you to quickly develop your skill with your new tool. If you buy a good quality-brand airbrush, apply a little tender loving care in maintaining it, not only will it last you for years it will also hold its purchase price should you wish to sell it on later.
Cans of compressed air as an alternative to using a compressor are a poor choice; firstly you’ll go through them like they were cans of fizzy-pop on a hot day as you learn/play with your shiny new airbrush. Also, cans lose pressure as they empty, and so trying to practice what worked yesterday you could find it doesn’t really work quite as well today … but it’s not your fault!
As with 3D printers, YouTube is an excellent resource for all aspects of airbrush; maintenance, use, techniques, tips and tricks for every level of experience.
If you decide to follow my advice and go for a quality-brand airbrush I suggest you start with checking out the following companies Paasche, Badger and Iwata (who also make an excellent range of compressors).